

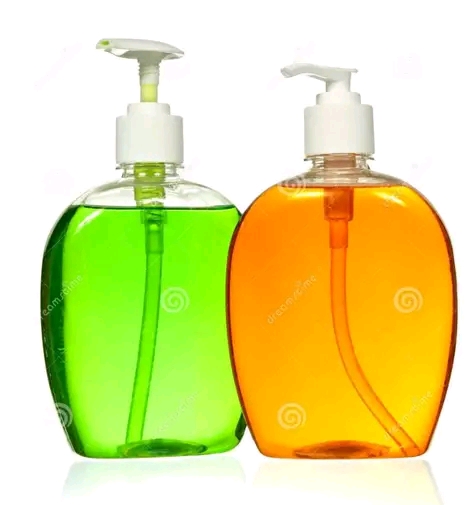
How to prepare liquid soap
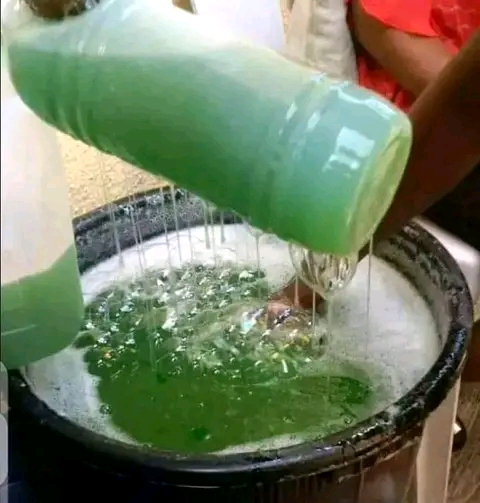
Producing liquid soap can be done using a variety of methods, but here’s a basic recipe:
Ingredients:
1. Distilled water
2. Potassium hydroxide (KOH)
3. Oils (such as coconut oil, olive oil, or palm oil)
4. Essential oils for fragrance (optional)
Steps:
1. Wear protective gear such as gloves and goggles.
2. Measure out your oils and heat them gently in a pot until they reach around 100°F (38°C).
3. In a separate container, measure out your distilled water.
4. Carefully add the potassium hydroxide to the water, stirring until dissolved. Be cautious as this step generates heat and fumes.
5. Once the oils and lye-water are at similar temperatures (around 100°F or 38°C), slowly pour the lye-water into the oils while stirring continuously.
6. Continue stirring the mixture until it thickens and reaches trace, which is when you can see a trace or line when you drizzle a bit of the mixture across the surface.
7. Add any essential oils for fragrance if desired, and mix thoroughly.
8. Pour the mixture into molds or containers.
9. Cover the containers and let the soap sit for 24-48 hours to saponify and solidify.
10. After it has solidified, you can dilute the soap with more water to achieve your desired consistency.
11. Stir gently to combine, then pour into dispensers or bottles for use.
Remember to label your containers properly and let the soap cure for a few weeks before using it for optimal results.
CLICK HERE TO DOWNLOAD THE BOOK
Certainly! Here are some additional tips and considerations for producing liquid soap:
1. **Choosing Oils**: Different oils will give your soap different properties. For example, coconut oil adds lather, while olive oil adds moisturizing properties. Experiment with different oil combinations to find the formula that works best for you.
2. **Calculating Ingredients**: Use a soap calculator to determine the precise amounts of oils, water, and lye needed based on your desired batch size and the specific oils you’re using.
3. **Safety Precautions**: Always handle lye with extreme caution. Wear protective gear and work in a well-ventilated area to avoid inhaling fumes. Keep vinegar nearby to neutralize lye spills.
4. **Consistency**: Liquid soap can vary in thickness depending on personal preference. You can adjust the consistency by adding more or less water during dilution.
5. **Fragrance and Additives**: Aside from essential oils, you can incorporate other additives like colorants, herbs, or exfoliants for additional benefits and aesthetics.
6. **pH Testing**: Liquid soap should have a pH level between 8 and 10 to be safe and effective for use on the skin. Use pH strips to test the pH level of your soap and adjust if necessary.
7. **Storage**: Store your liquid soap in airtight containers away from direct sunlight and heat to prevent spoilage. Use pumps or squeeze bottles for easy dispensing.
8. **Labeling**: Clearly label your soap containers with the ingredients used and the date of production for reference.
Remember that soap making requires precision and patience, especially when working with lye. Practice proper safety measures and enjoy the creative process of making your own liquid soap!
How to produce paint
Producing paint involves combining pigments, binders, solvents, and additives to create a smooth, durable, and colorful product. Here’s a general overview of the process:
1. **Selecting Pigments**: Choose the pigments that will give your paint its desired color. Pigments can be natural (like minerals) or synthetic (manufactured).
2. **Preparing Binders**: Binders hold the pigment particles together and adhere them to the surface. Common binders include linseed oil, acrylic polymer, or latex.
3. **Mixing Pigments and Binders**: Gradually add pigments to the binder while stirring thoroughly to ensure even distribution. The amount of pigment used will determine the color intensity.
4. **Adjusting Consistency**: Add solvents such as water, mineral spirits, or turpentine to adjust the consistency of the paint. This helps achieve the desired thickness and viscosity.
5. **Adding Additives**: Incorporate additives such as drying agents (to speed up drying time), anti-fungal agents (to prevent mold and mildew growth), or flow agents (to improve application).
6. **Testing and Adjusting**: Test the paint for color, consistency, and coverage. Make any necessary adjustments by adding more pigment, binder, solvent, or additives.
7. **Packaging**: Once the paint is thoroughly mixed and adjusted, transfer it into appropriate containers such as cans or tubes, and label them with the color name, type of paint, and any relevant safety information.
8. **Quality Control**: Perform quality control checks to ensure the paint meets standards for color accuracy, consistency, durability, and safety.
Keep in mind that different types of paint (e.g., oil-based, acrylic, watercolor) require slightly different formulations and processes. Additionally, manufacturing paint on a large scale may involve specialized equipment and facilities to ensure consistency and efficiency.
Certainly! Here are some additional considerations and tips for producing paint:
1. **Safety Precautions**: Wear appropriate protective gear, such as gloves, goggles, and a mask, when handling pigments, binders, solvents, and additives. Some materials may be toxic or harmful if inhaled or absorbed through the skin.
2. **Grinding Pigments**: Some pigments may need to be ground into finer particles before being mixed with binders. This can be done using a mortar and pestle, a paint mill, or a ball mill, depending on the scale of production.
3. **Mixing Techniques**: Use mechanical mixers or stirrers to ensure thorough mixing of pigments, binders, solvents, and additives. Proper mixing helps prevent clumping and ensures a consistent color and texture throughout the paint.
4. **Color Matching**: For consistency across batches, keep detailed records of the proportions of pigments, binders, and additives used to achieve specific colors. This is particularly important for commercial paint production where customers expect uniformity.
5. **Drying Time**: Different types of binders and additives can affect the drying time of paint. Consider the intended use of the paint (e.g., interior vs. exterior) and adjust the formulation accordingly to achieve the desired drying time.
6. **Environmental Impact**: Choose environmentally friendly ingredients and manufacturing processes whenever possible. Water-based paints, for example, produce fewer volatile organic compounds (VOCs) than solvent-based paints, making them a more eco-friendly option.
7. **Storage and Shelf Life**: Store paint in a cool, dry place away from direct sunlight and extreme temperatures to extend its shelf life. Properly sealed containers help prevent evaporation of solvents and maintain the quality of the paint.
8. **Regulatory Compliance**: Be aware of local regulations and standards governing the manufacturing, labeling, and disposal of paint products. Ensure compliance with safety, health, and environmental regulations to avoid legal issues and ensure consumer safety.
By following these additional tips and considerations, you can produce high-quality paint that meets safety standards and customer expectations.
Certainly! Here are a few more tips and considerations for producing paint:
1. **Consistency Testing**: Regularly test the consistency and viscosity of your paint during the production process. This ensures that the paint applies smoothly and evenly, without dripping or running.
2. **Particle Size Control**: Pay attention to the particle size of pigments when grinding or purchasing them. Finer particles generally result in smoother paint finishes, while coarser particles can create texture or graininess.
3. **Color Stability**: Some pigments may be prone to fading or changing color over time when exposed to light or other environmental factors. Consider using lightfast pigments or adding UV inhibitors to improve color stability, especially for outdoor paints.
4. **Thinning and Dilution**: If your paint is too thick or concentrated, you can thin it by adding more solvent or binder. Conversely, if it’s too thin, you can adjust the consistency by adding more pigment or thickening agents.
5. **Custom Formulations**: Experiment with different combinations of pigments, binders, and additives to create custom paint formulations tailored to specific applications or preferences. This allows you to offer unique products that stand out in the market.
6. **Batch Records**: Keep detailed records of each paint batch, including the ingredients used, mixing instructions, quality control tests, and any deviations from standard procedures. This documentation helps traceability, troubleshooting, and quality assurance.
7. **Customer Feedback**: Solicit feedback from customers who use your paint products to identify areas for improvement and opportunities for innovation. Pay attention to their preferences regarding color, performance, and environmental impact.
8. **Continuous Improvement**: Regularly review your production processes and formulations to identify opportunities for efficiency gains, cost savings, or quality enhancements. Continuous improvement ensures that your paint products remain competitive in the market.
By incorporating these additional tips into your paint production process, you can refine your techniques, enhance product quality, and meet the evolving needs of your customers.
Here are a few more considerations for producing paint:
1. **Packaging Design**: Invest in attractive and functional packaging for your paint products. Choose containers that are durable, easy to open, and provide adequate protection against leaks and spills. Labeling should be clear, informative, and compliant with relevant regulations.
2. **Supply Chain Management**: Establish strong relationships with suppliers of raw materials to ensure consistent quality and availability. Monitor supply chain logistics to minimize delays and disruptions in production.
3. **Batch Size Optimization**: Evaluate the optimal batch size for your paint production process. Larger batches can lead to economies of scale and lower production costs, but smaller batches offer greater flexibility and reduce the risk of inventory obsolescence.
4. **Quality Assurance Testing**: Implement robust quality assurance protocols to monitor the performance and safety of your paint products. Conduct regular testing for factors such as color accuracy, adhesion, durability, and resistance to environmental conditions.
5. **Market Research**: Stay informed about market trends, customer preferences, and competitor offerings in the paint industry. Identify emerging opportunities for innovation and differentiation to maintain a competitive edge.
6. **Training and Development**: Invest in training and development programs for your production staff to enhance their skills and knowledge of paint manufacturing techniques. Empower employees to contribute ideas for process improvement and innovation.
7. **Sustainability Practices**: Incorporate sustainable practices into your paint production process, such as using recycled materials, reducing waste, and minimizing energy consumption. Communicate your commitment to environmental responsibility to attract environmentally conscious customers.
8. **Community Engagement**: Build positive relationships with local communities by supporting initiatives related to education, environmental conservation, and social responsibility. Engage with stakeholders to address concerns and foster goodwill toward your paint manufacturing business.
By integrating these additional considerations into your paint production operations, you can optimize efficiency, enhance product quality, and cultivate a positive reputation in the industry and community.
The production of paint involves various chemicals, each serving a specific purpose in the formulation. Here are some of the key chemicals commonly used in paint manufacturing:
1. **Pigments**: These are finely ground powders that provide color and opacity to the paint. Pigments can be organic or inorganic compounds, minerals, or synthetic substances. Examples include titanium dioxide (white pigment), iron oxides (red, yellow, and brown pigments), and phthalocyanine blue (blue pigment).
2. **Binders**: Binders are resins or polymers that hold the pigment particles together and adhere them to the painted surface. They also contribute to the paint’s durability, flexibility, and adhesion. Common binders include acrylics, alkyds, epoxies, polyurethanes, and latex.
3. **Solvents**: Solvents are liquids used to dissolve or disperse the pigment and binder components to achieve the desired consistency and viscosity of the paint. They evaporate during the drying process, leaving behind a solid paint film. Examples of solvents include water (for water-based paints), mineral spirits, turpentine, and various organic solvents.
4. **Additives**: Additives are chemical substances added to paint formulations to modify or enhance certain properties such as flow, leveling, drying time, anti-settling, anti-foaming, UV resistance, and mildew resistance. Examples of additives include surfactants, thickeners, dispersants, anti-oxidants, anti-fungal agents, and UV stabilizers.
5. **Fillers**: Fillers are inert materials added to paint formulations to improve volume, reduce cost, and enhance properties such as opacity, texture, and smoothness. Common fillers include calcium carbonate, talc, silica, kaolin clay, and barytes.
6. **Driers**: Driers are additives that accelerate the drying time of the paint by promoting the oxidation and polymerization of the binder. They are typically metal compounds such as cobalt, manganese, or zirconium salts.
7. **Biocides**: Biocides are additives used to inhibit the growth of microorganisms such as bacteria, fungi, and algae in paint formulations, preventing spoilage and extending shelf life. Common biocides include isothiazolinones, phenols, and organic acids.
8. **Surfactants**: Surfactants are surface-active agents added to paint formulations to improve wetting, dispersion, and adhesion properties. They help reduce surface tension and promote uniform coverage of the painted surface.
These are just some of the primary chemicals used in paint production. The specific formulation of a paint product will vary depending on factors such as intended use, performance requirements, environmental considerations, and regulatory compliance.
Certainly! Here are a few more chemicals commonly used in paint production:
9. **Modifiers**: Modifiers are chemicals added to paint formulations to alter specific properties such as viscosity, flexibility, hardness, or gloss. They can enhance performance characteristics and tailor the paint to meet specific application requirements. Examples include plasticizers, rheology modifiers, and gloss enhancers.
10. **Crosslinkers**: Crosslinkers are additives that promote chemical crosslinking reactions between polymer chains in the binder, resulting in a more durable and resistant paint film. Crosslinkers improve adhesion, abrasion resistance, chemical resistance, and overall coating performance.
11. **Antifoaming Agents**: Antifoaming agents are chemicals used to prevent the formation of foam during paint manufacturing, mixing, application, and drying processes. They help maintain the desired consistency and avoid surface defects caused by trapped air bubbles.
12. **Antiskinning Agents**: Antiskinning agents are additives that inhibit the formation of a skin or surface film on paint stored in containers or during application. They help prolong the shelf life of paint products by preventing premature drying and skinning in the container.
13. **Stabilizers**: Stabilizers are additives used to maintain the stability and integrity of paint formulations by preventing degradation, discoloration, or separation of components over time. They protect against factors such as UV radiation, oxidation, and thermal degradation.
14. **Chelating Agents**: Chelating agents are chemicals that form complexes with metal ions present in the paint formulation, preventing their catalytic activity and potential adverse effects on paint performance. They help improve color stability, prevent discoloration, and enhance the durability of the paint film.
15. **Resins**: Resins are polymeric materials used as binders or film formers in paint formulations. They provide adhesion, cohesion, and mechanical strength to the paint film. Resins can be natural (such as plant resins or shellac) or synthetic (such as acrylics, alkyds, or epoxies).
16. **UV Absorbers**: UV absorbers are additives that absorb or scatter ultraviolet (UV) radiation, protecting the paint film from degradation and color fading caused by exposure to sunlight. They help maintain the appearance and performance of exterior paints exposed to outdoor conditions.
These additional chemicals play important roles in paint production and contribute to the overall performance, durability, and aesthetic qualities of the finished paint products.
How to produce bathing soap
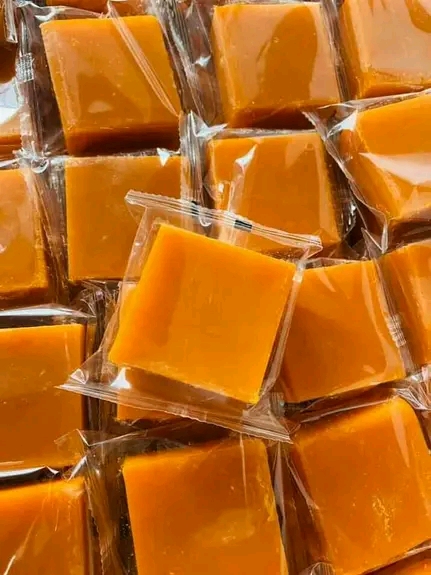
Producing bathing soap can be a fun and rewarding process. Here’s a basic recipe and steps to get you started:
**Ingredients**:
1. Coconut oil
2. Olive oil
3. Palm oil
4. Sodium hydroxide (lye)
5. Distilled water
6. Essential oils for fragrance (optional)
7. Additives like oatmeal, honey, or dried herbs (optional)
**Equipment**:
1. Safety gear: goggles, gloves, long sleeves
2. Stainless steel or heat-resistant plastic containers
3. Stick blender
4. Thermometer
5. Soap molds
**Steps**:
1. **Prepare your workspace**: Make sure you have all your ingredients and equipment ready. Wear safety gear to protect yourself from lye splashes.
2. **Measure your ingredients**: Weigh out the oils and carefully measure the lye and water using a scale.
3. **Mix lye and water**: Slowly add the lye to the water in a well-ventilated area, stirring continuously. Be cautious, as this step generates heat and fumes. Allow the lye solution to cool to around 100°F (38°C).
4. **Melt oils**: Heat the coconut oil, olive oil, and palm oil in a pot until they are completely melted and reach around 100°F (38°C).
5. **Combine oils and lye solution**: Once both the oils and lye solution are at a similar temperature, pour the lye solution into the oils slowly, stirring continuously.
6. **Blend**: Use a stick blender to mix the oils and lye solution until they reach trace, which is when the mixture thickens to the consistency of thin custard.
7. **Add fragrance and additives**: If desired, add essential oils for fragrance and any additives like oatmeal, honey, or dried herbs. Stir gently to incorporate.
8. **Pour into molds**: Pour the soap mixture into your soap molds. Tap the molds gently on a flat surface to release any air bubbles.
9. **Cure**: Cover the molds with a lid or plastic wrap and let the soap cure for 24-48 hours. During this time, the soap will harden and continue to saponify.
10. **Unmold and cut**: After the curing period, unmold the soap and cut it into bars using a sharp knife. Place the bars on a rack in a well-ventilated area to cure for an additional 4-6 weeks. This allows excess moisture to evaporate and the soap to harden further.
11. **Label and store**: Once fully cured, label your soap bars with the date of production and any ingredients used. Store them in a cool, dry place until ready to use.
Remember to always use caution when working with lye and follow safety guidelines. With practice and experimentation, you can create beautiful, customized bathing soap bars to enjoy or share with others.
How to produce Izal
Izal is a disinfectant solution commonly used for cleaning and disinfecting surfaces. Here are the basic steps to produce it:
1. **Ingredients**: Gather the necessary ingredients, which typically include:
– 2 liters of water
– 50 grams of hydrated lime (calcium hydroxide)
– 100 grams of sodium hypochlorite solution (bleach)
– 200 grams of surfactant (like detergent)
2. **Safety Precautions**: Wear appropriate protective gear such as gloves and goggles to avoid contact with the chemicals.
3. **Mixing**: Pour the water into a large container. Slowly add the hydrated lime while stirring continuously until it dissolves completely.
4. **Adding Bleach**: Carefully pour in the sodium hypochlorite solution (bleach) while stirring gently. Be cautious, as mixing bleach with other chemicals can produce harmful gases.
5. **Adding Surfactant**: Gradually add the surfactant (detergent) to the mixture while stirring continuously until well combined.
6. **Storage**: Once mixed, transfer the solution into appropriate storage containers, preferably ones with tight-sealing lids to prevent evaporation.
7. **Labeling**: Clearly label the containers with the name of the solution (Izal), the date of production, and any necessary safety precautions or usage instructions.
8. **Usage**: Use the Izal solution as needed for disinfecting surfaces. Dilute it with water according to the recommended ratio for effective cleaning.
9. **Safety**: Always follow safety guidelines and precautions when handling chemicals, and store the Izal solution out of reach of children and pets.
10. **Disposal**: Dispose of any leftover solution or empty containers properly according to local regulations for chemical waste disposal.
Certainly! Here are some additional details for each step:
1. **Ingredients**:
– Hydrated lime (calcium hydroxide) is available at hardware stores or chemical supply shops.
– Sodium hypochlorite solution, commonly known as household bleach, can be found in most supermarkets or stores.
– Surfactants or detergents can be purchased from cleaning supply stores or online.
2. **Safety Precautions**:
– Work in a well-ventilated area to avoid inhaling fumes.
– Avoid mixing bleach with other chemicals, especially ammonia, as it can create toxic gases.
– If accidentally exposed to the solution, rinse skin or eyes immediately with water and seek medical attention if necessary.
3. **Mixing**:
– Hydrated lime should be added slowly to prevent clumping.
– Stirring helps dissolve the hydrated lime evenly in the water.
4. **Adding Bleach**:
– Measure the bleach carefully to ensure the correct concentration in the final solution.
– Avoid splashing or spilling bleach, as it can cause skin irritation and damage surfaces.
5. **Adding Surfactant**:
– The surfactant helps the solution spread evenly and improves its cleaning effectiveness.
– Choose a surfactant that is compatible with bleach to avoid chemical reactions.
6. **Storage**:
– Store Izal solution in a cool, dry place away from direct sunlight.
– Keep containers tightly sealed to prevent evaporation and contamination.
7. **Labeling**:
– Clearly label containers with the name “Izal” and any safety warnings or instructions for use.
– Include the date of production to track the solution’s shelf life.
8. **Usage**:
– Dilute Izal solution with water according to the recommended ratio for specific cleaning tasks.
– Test the solution on a small, inconspicuous area before using it on delicate surfaces.
9. **Safety**:
– Keep the Izal solution out of reach of children and pets.
– Wear gloves and protective clothing when handling the solution to minimize skin contact.
10. **Disposal**:
– Follow local regulations for disposing of chemical waste.
– Do not pour Izal solution down drains or sewers unless directed by authorities.
How to Produce insecticide
The production process for insecticides typically involves several steps:
1. **Formulation**: Determine the type of insecticide (e.g., synthetic chemicals, natural compounds) and its formulation (e.g., liquid, powder, granules).
2. **Chemical Synthesis**: If producing synthetic insecticides, chemical synthesis is involved. This requires expertise in organic chemistry and access to appropriate laboratory facilities.
3. **Quality Control**: Ensure that the insecticide meets regulatory standards and is safe for use. This involves testing for potency, purity, stability, and safety.
4. **Packaging**: Once the insecticide is formulated and tested, it is packaged into containers suitable for storage, transportation, and application.
5. **Labeling and Regulation**: Ensure that the product is properly labeled with instructions for use, safety precautions, and regulatory information. Compliance with local regulations is crucial.
6. **Distribution**: Distribute the insecticide to retailers, wholesalers, or directly to end-users, depending on the distribution strategy.
7. **Safety Precautions**: Throughout the production process, adhere to safety protocols to protect workers and the environment from exposure to potentially harmful chemicals.
It’s important to consult with experts and regulatory agencies to ensure that the insecticide production process complies with all relevant regulations and safety standards.
Certainly, here’s a more detailed breakdown of each step:
1. **Formulation**:
– Determine the active ingredient(s) and inert ingredients needed for the desired insecticidal effect.
– Decide on the concentration and formulation type (e.g., emulsifiable concentrates, wettable powders, granules, aerosols) based on factors such as target pests, application method, and environmental considerations.
2. **Chemical Synthesis**:
– For synthetic insecticides, chemical synthesis involves designing and synthesizing the active ingredient(s) through organic chemical reactions.
– This step requires specialized equipment, skilled chemists, and adherence to safety protocols to handle potentially hazardous chemicals.
3. **Quality Control**:
– Perform quality control tests to ensure the insecticide meets regulatory standards and is safe and effective.
– Tests may include analytical methods such as chromatography, spectrophotometry, and biological assays to assess potency, purity, stability, and potential toxicity.
4. **Packaging**:
– Choose appropriate packaging materials and container sizes based on the formulation and intended use of the insecticide.
– Packaging should be designed to protect the product from degradation, leakage, and contamination during storage and transportation.
5. **Labeling and Regulation**:
– Develop labels that comply with regulatory requirements and provide essential information to users, including active ingredients, safety precautions, application rates, and environmental hazards.
– Ensure compliance with local, national, and international regulations governing the production, labeling, and use of insecticides.
6. **Distribution**:
– Establish distribution channels to deliver the insecticide to retailers, agricultural suppliers, pest control professionals, government agencies, or end-users.
– Maintain proper inventory management to ensure timely delivery and availability of the product.
7. **Safety Precautions**:
– Implement safety measures throughout the production process to protect workers, the environment, and the public from exposure to hazardous chemicals.
– Provide training, personal protective equipment (PPE), and emergency response procedures to minimize risks associated with handling and storing insecticides.
By following these steps carefully and adhering to strict quality control and safety protocols, insecticide manufacturers can produce effective and safe products for pest management while minimizing environmental and health risks.
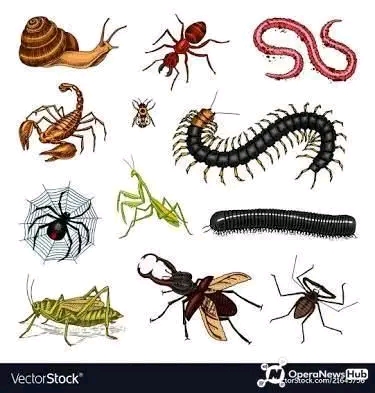
Producing insecticides for household pests involves creating formulations effective against common insects found indoors, such as ants, cockroaches, spiders, and flies. Here’s a simplified guide to producing such insecticides:
1. **Research and Formulation**:
– Identify the target pests and their behaviors to determine the most effective active ingredients and formulation types.
– Common active ingredients for household insecticides include pyrethroids (e.g., permethrin, cypermethrin), neonicotinoids (e.g., imidacloprid), and insect growth regulators (e.g., methoprene).
– Formulate the insecticide as sprays, baits, or powders, considering factors such as application methods, residual effects, and safety for indoor use.
2. **Ingredient Acquisition**:
– Source high-quality active ingredients and inert additives from reputable suppliers, ensuring they meet regulatory standards for purity and safety.
– Consider using natural or eco-friendly ingredients for consumers seeking environmentally friendly alternatives.
3. **Production Process**:
– Mix the active ingredients with inert additives and solvents in appropriate proportions to achieve the desired concentration and formulation type.
– Utilize equipment such as mixing tanks, homogenizers, and dispersers to ensure thorough blending and dispersion of ingredients.
– Conduct quality control tests during production to verify the potency, stability, and consistency of the insecticide formulation.
4. **Packaging and Labeling**:
– Package the insecticide in user-friendly containers, such as spray bottles, aerosol cans, or bait stations, with child-resistant caps for safety.
– Design labels that provide clear instructions for use, safety precautions, active ingredients, and storage recommendations.
– Ensure compliance with labeling regulations and include relevant warnings and hazard symbols.
5. **Distribution and Marketing**:
– Establish distribution channels to make the insecticide available through retail stores, online platforms, or direct sales.
– Develop marketing materials highlighting the product’s effectiveness, safety, and convenience for household pest control.
– Consider offering educational resources and customer support to assist users in proper application and pest management strategies.
6. **Safety and Environmental Considerations**:
– Prioritize safety throughout the production process by implementing strict quality control measures and safety protocols.
– Use low-toxicity formulations and environmentally friendly ingredients whenever possible to minimize risks to humans, pets, and the environment.
– Educate consumers about proper application techniques, storage practices, and disposal guidelines to prevent misuse and minimize environmental impact.
By following these steps and focusing on efficacy, safety, and environmental sustainability, producers can develop insecticides tailored for household use that effectively control indoor pests while minimizing risks to health and the environment.
Certainly, here are some additional considerations for producing insecticides for house insects:
7. **Targeted Formulations**:
– Tailor the insecticide formulations to target specific household pests effectively. For example, gel baits are effective against cockroaches, while aerosol sprays are suitable for flying insects like flies and mosquitoes.
– Consider incorporating attractants or pheromones into the formulations to enhance efficacy and lure pests to the treated areas.
8. **Residual Effects and Longevity**:
– Develop formulations with extended residual activity to provide long-lasting protection against household pests.
– Balance the concentration of active ingredients to ensure efficacy while minimizing the risk of residue buildup and potential toxicity over time.
9. **User-Friendly Application**:
– Design applicators and packaging that facilitate easy and precise application of the insecticide, especially in hard-to-reach areas where pests commonly hide.
– Provide clear instructions and dosage recommendations to help users apply the insecticide effectively while minimizing waste and overapplication.
10. **Integrated Pest Management (IPM) Approach**:
– Encourage the adoption of integrated pest management practices alongside insecticide use to maximize efficacy and minimize reliance on chemical treatments.
– Educate consumers about preventive measures, such as sanitation, sealing entry points, and reducing pest attractants, to complement insecticide applications and prevent reinfestation.
11. **Regulatory Compliance**:
– Stay updated on regulations and requirements governing the production, labeling, and sale of household insecticides in target markets.
– Ensure compliance with safety standards, efficacy testing protocols, and labeling regulations set by regulatory agencies to guarantee product quality and consumer safety.
12. **Consumer Feedback and Continuous Improvement**:
– Establish mechanisms for collecting and analyzing feedback from consumers regarding the performance, safety, and user experience of the insecticide products.
– Use consumer insights to identify areas for improvement and innovation, such as developing new formulations, addressing emerging pest challenges, or enhancing product packaging and usability.
By incorporating these additional considerations into the production process, insecticide manufacturers can produce effective, user-friendly, and environmentally responsible solutions for controlling household pests and improving indoor living environments.
[…] How to produce insecticide, liquid soap, Paint and Izal 2024 […]
[…] Tiger nut juice is a creamy, slightly sweet beverage made from tiger nuts, which are small tubers with a nutty flavor. […]